This software is needed to write programs and connect to a wide range of Arduino and compatible boards for programming them. IDE means “Integrated Development Environment”, and you will find this name in most modern software used for programming. Before IDEs were developed, programming used to involve several steps/software to write the programs, different commands for compiling, linking, debugging, uploading etc. With IDEs, it became possible to type up the programs in the same software that does all the other steps involved programming, often just involving a single button or menu command to do everything that is needed to run your program.
Installation
Download and install it from the official website:
https://www.arduino.cc/en/software
If you install with default options, you will get the icon shown below on your desktop:

First Run
When you run Arduino IDE for the first time on Windows, you will probably get a Windows Security Alert from the Windows Defender Firewall as below, advising that Java(TM) Platform:
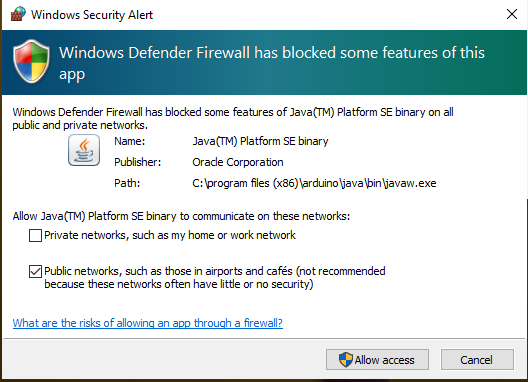
This alert is for Java rather than Arduino because Arduino is a Java based software. On my computer, default tick is on Public networks, on yours it can be on either Public or Private network. This is based on what network you are connected to, and how you have configured its “Network profile”, like I have put mine as Public:

This network access is needed for uploading programs or “sketches” over WiFi or Ethernet to supported boards. It might be needed for downloading configurations of new boards as well, I haven’t tested this. Allow access to the default option that comes on your computer.
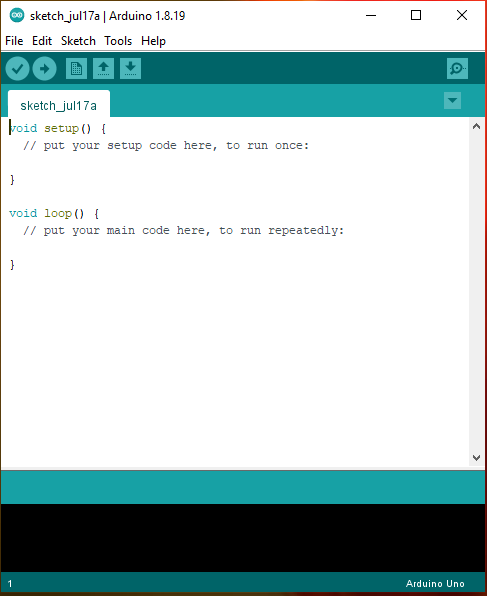
A default program structure is loaded, with just two empty functions setup() and loop(). The programming is done in a flavour of C/C++ in terms of the language, but you won’t have access to the usual standard libraries available on a PC due to comparatively much lower resources on the Arduino boards.
Testing
We can use a very simple program to test our setup is working.

On my laptop, the Port is greyed out on my laptop, which means no port is available for connection to an Arduino board. Port here refers to a Serial Port, and my laptop, like most laptops these days, has no built-in Serial Port. If you have an older laptop, or a desktop, or if you have a USB device connected, you may see some port number/s available there. If you do, take a note of those numbers, they are not the ones we will use for programming our Arduino (or uploading an sketch in Arduino lingo).
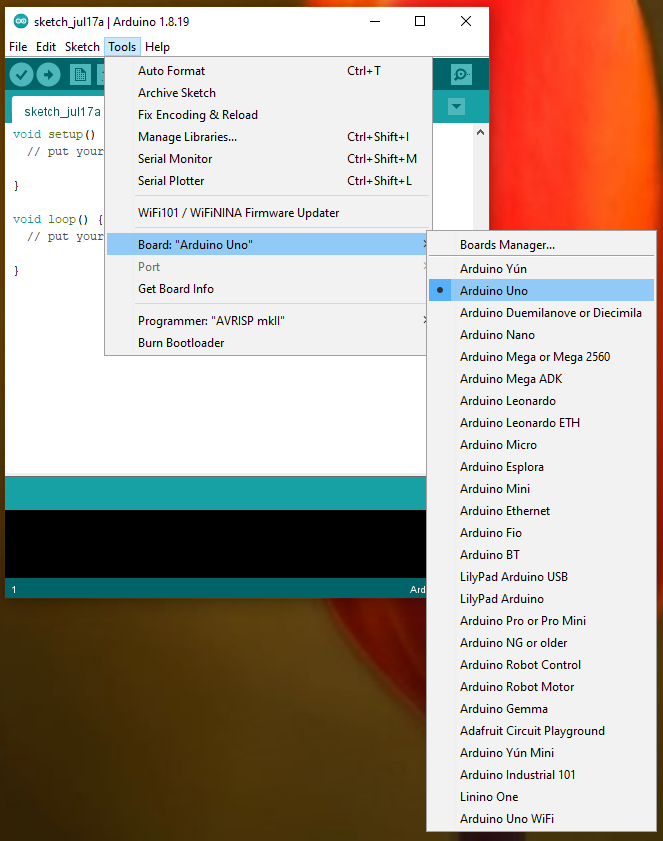
The default board is Arduino Uno, which you can confirm by going to Tools in the menu as shown above. Uno (ù·no / oo-now) meaning “one” in Italian, sounds like it was the first Arduino board, but that is not so. The first one was Serial Arduino or Arduino-RS232, but Uno has been a very popular and cheap board.
If you have an Arduino Uno board, connect it to your computer with a USB cable. If you have a different board, such as Mega 2560, skip down to the Changing Boards section, follow that, and then come back here to continue.
Port Numbers
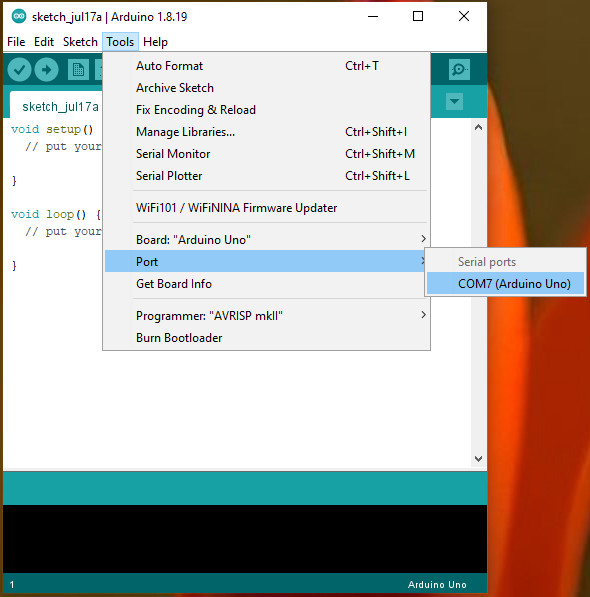
If everything works fine, and your computer recognises the connected Arduino board, it will create a Serial Port for it, and refer to it as COM + a number, and may optionally also tell what it is. For example, mine comes up as COM7 (Arduino Uno) as shown below:
For you, it is likely to be a different number, such as COM2 or any other number. Windows remembers the devices that have a Serial Port when you connect them to the computer, and assigns them numbers in series, like COM1, COM2, COM3, … This means that I have already connected 6 different Serial Port devices to my computer that Windows remembers about. If you come across the term RS232, it refers to either a Serial Port, or to the Communication Protocol used for Serial Port communications.
Select the port number that has just appeared.
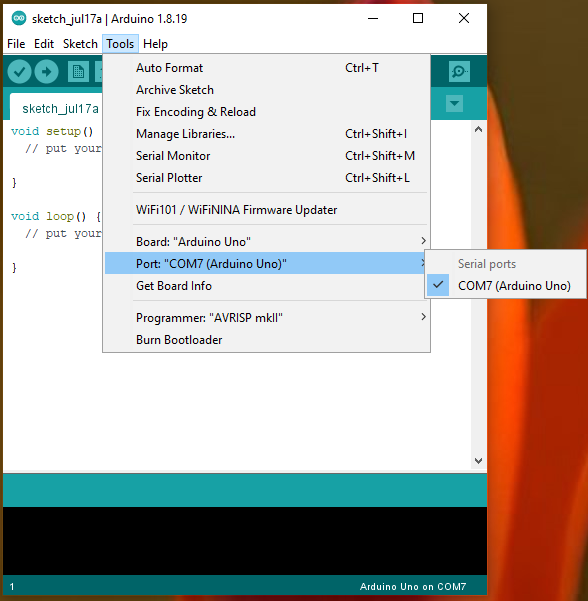
In the lower-right or bottom-right corner, Arduino IDE tells you which board has been selected along with the active Serial Port number. You are able to open multiple instances of Arduino IDE and connecting them to different Arduino boards at the same time. The information at the lower-right corner helps you tell easily which IDE connects to which board.
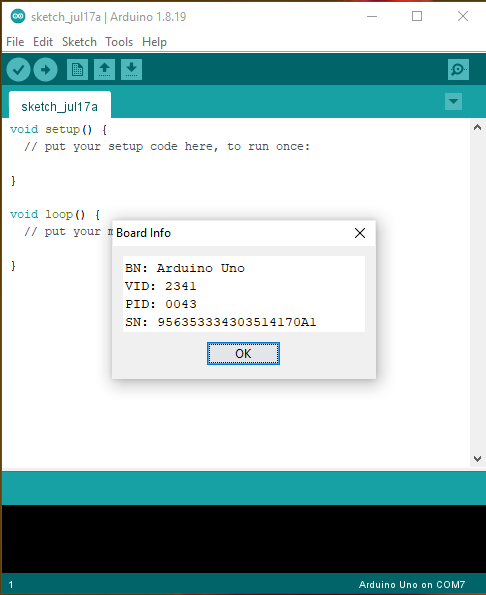
You can go to Tools>Get Board Info and you will get an information box as below:
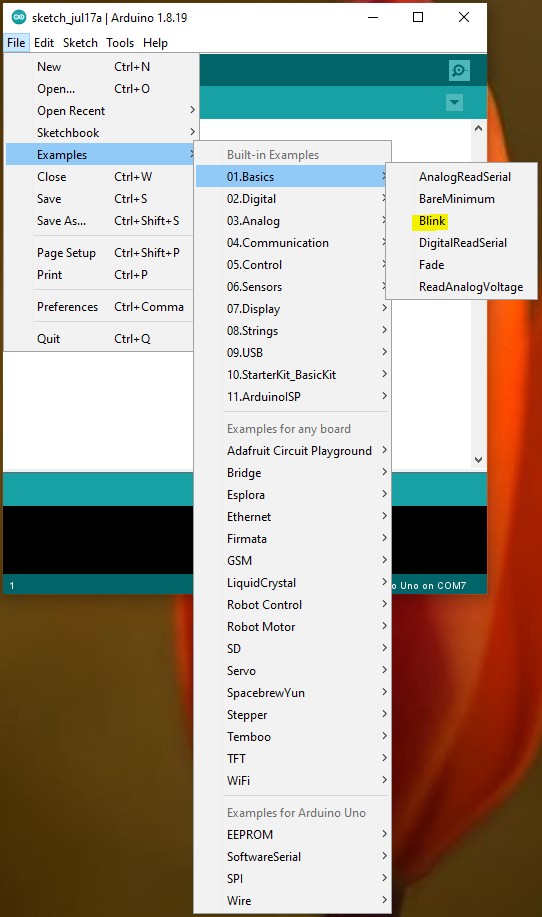
Now go to File>Examples>01.Basics>Blink as shown below:
Arduino IDE will open another instance of itself, with the Blink program loaded, and still connected to the same board over the same Serial Port as shown below:
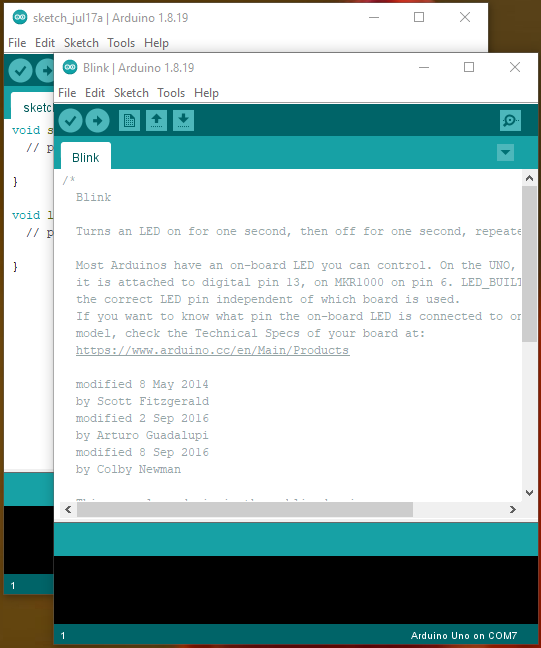
You can safely close the previous window, and just have the Blink window open. You can also resize the window to have more space available to read / modify the sketch. There is a small LED light on the Arduino Uno board, and this program example turns the LED on for a second, and then turns it off for a second, and then repeats the same steps. Effectively what you see is the LED blinking. This also happens to be the program that is loaded on brand new Arduino boards, so it will be hard to tell if the sketch that we upload is working. To ensure that our program is running, instead of the default program that comes pre-loaded on Arduino Uno boards, we are going to modify the blinking style as below:
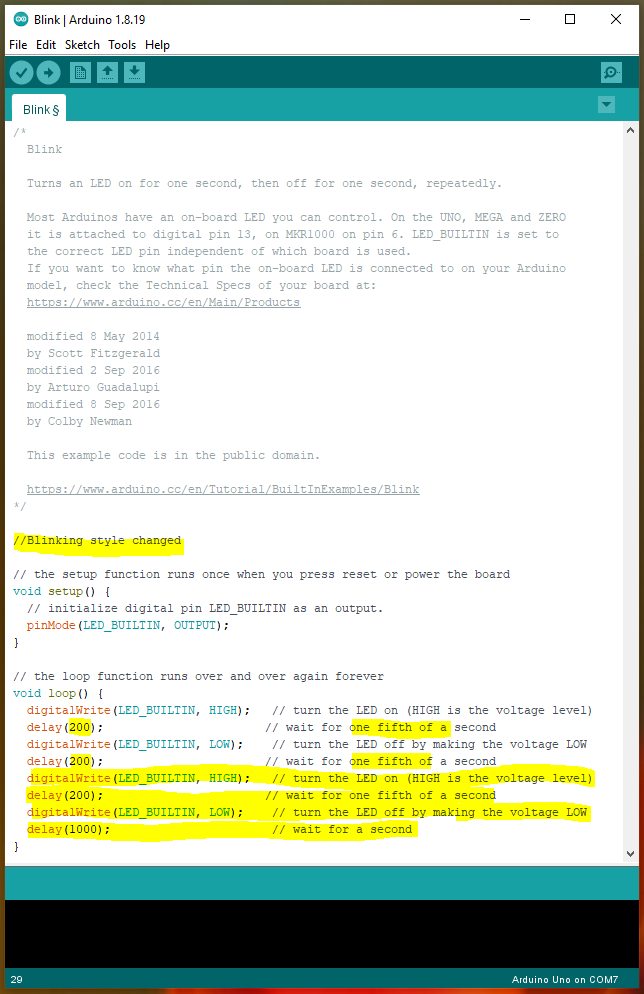
After making the modifications, click on the right arrow in the circle below the Edit menu, as shown below:
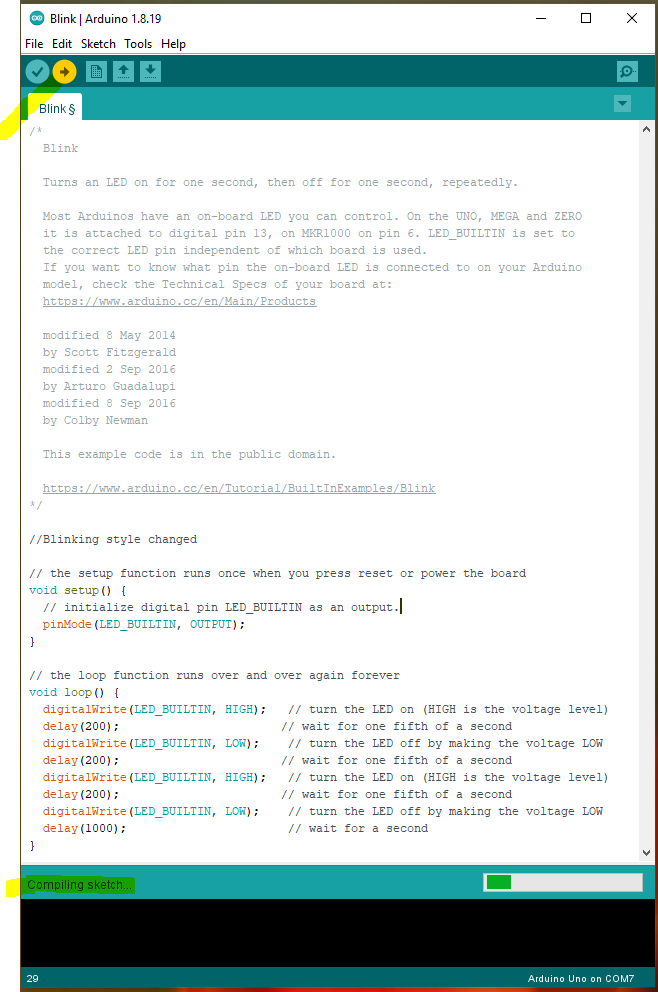
The program will start compiling the sketch and tell you what is happening in the black window at the bottom, as shown below:

If you have done no typing mistakes, the sketch will get compiled and uploaded to the Arduino Uno, and the LED will will blink twice quickly, within 0.6 of a second, and then turn off for one second, and then keep repeating.
If you get error messages at this stage, it’s likely to be typing mistakes on your part, pay attention to every little thing, every spelling, capitalisation of the characters, all punctuation marks, all need to be correct for the computer to understand what you are trying to tell it. Otherwise it refuses to cooperate and gives you a list of error messages back to see how you like reading and understanding those. Attention to detail is extremely important in computer programming, mistakes are not tolerated at all, doesn’t matter how small.
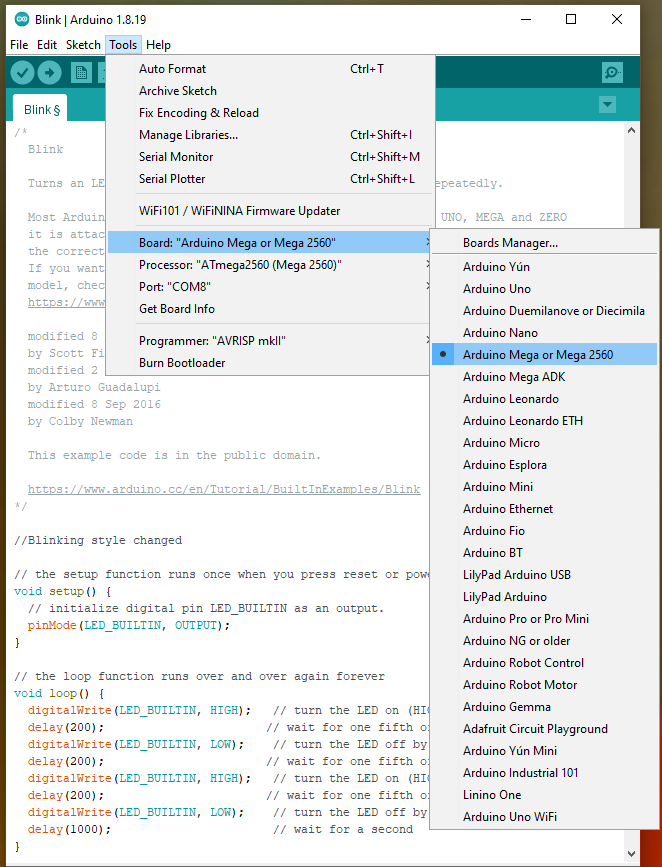
Changing Boards
If you have a board, which is listed in the Arduino IDE by default, such as the Mega 2560 as shown below, select it, and connect the board to computer with a USB cable:
Now select the Port number that just appeared. COM8 appeared on my computer when I connected a Mega 2560 board.
Now go to Tools>Get Board Info, and you should get some information as shown below:
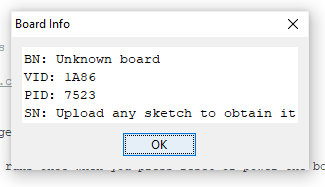
If the board isn’t connected properly, you won’t get the information box shown above.
If you skipped to this section because you had a board other than Arduino Uno, you can now go back to the Port Numbers section to continue. If the board has a controllable LED on it, it should blink as intended. I’ve tested it on Mega 2560, and it worked without changing any code.
To be continued … next step will be to connect a board which doesn’t appear in the default list
3,007 total views, 1 views today